Since I have no knitting to show you, and people have asked how I do my hanging tomato baskets, today will be a how to post.
How to plant your own hanging tomato basket.
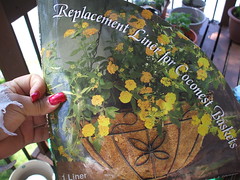
Step 1. If you have never done this before, get a metal hanging basket lined with coco-fiber (coir) make sure there is a circle on the bottom not x's or floral shapes - you need to get the tomato through there. If you have baskets from previous years, buy new liners. The old liner can harbor, mold, fungus, disease etc. In prior years I used pre-formed liners, but like an idiot, this year I bought the wrong size and then the store was sold out of the correct size. So I was forced to use these liners.

2. The biggest issue with this type of liner is forming it to the basket. If you were just planting flowers on top, you could fill it with potting soil and that would help work it into shape. So, once you get pot and liner, work the liner into the pot and make an x shape cut into the bottom of the liner.
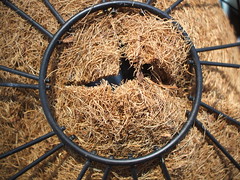
Don't worry if it seems large, the plant and the soil will keep it closed.
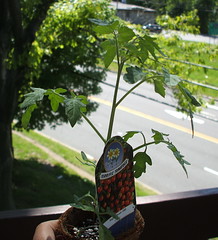
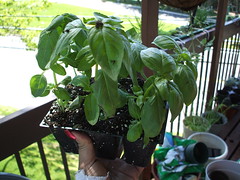
3. Choose your tomato plants. I try for slightly willowy plants over stocky ones, and you want to choose younger rather than more mature plants. i don't think it would be a huge issue with a more mature plant, but working the rootball will be more difficult and having the roots messed with may cause stress and shock your plant. This is the plant I planted yesterday. It is a sweeet 100, I also did a grape tomato as well.

4. Take the plant out of the pot and squish the rootball into an oblong, footballish shape.
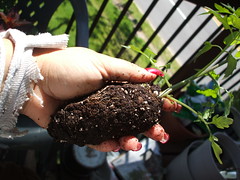
(that frayed cuff is attached to an equally frayed, "holey" sweatshirt I won't give up from Tony's 1999 rookie season)
5. Work the rootball up ( some books/mags tell you to put the plant through - but I never can do that without roughing up the leaves too much) into the hole, it will push the points of the X up into the basket. Once the rootball is in the basket, the points go back down to secure the stem. DOn't worry about excess soil on the outside - it will wash away after a watering or 2.


6. Fill basket with well draining light potting soil. I mix moisture control ( yes well draining and holding moisture at the same time is a tall order) potting soil by miracle grow, mixed with 25-33% miracle grow perlite. Be very careful at first to get the soil evenly around the roots. Then fill to just over 1/2 way.
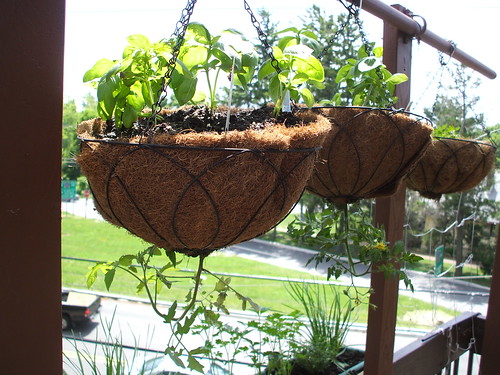
7. Get some basil - these 2 pots have sweet basil, others will have lemon basil, thai basil etc. But use what you like to eat.
plant the basil in the basket and fill with more soil.
8. Hang water and (sigh) wait.

You Should Work with Things |
 You are a very hands on sort of person. You like doing physical work and moving around. It would kill you to be at a desk job all day. You don't like to sit still for too long. You are very energetic, and you get bored if you aren't able to channel your hyperactivity. You are good at mastering difficult tasks. You have excellent eye hand coordination, and you are quite graceful. |
You mean to tell me that you do all that garden work and things outside with those nails? WOW!!! Who would have thought. You know all your knitting talk is such a foreign language to me. I didn't get a lot of what you were even talking about. LOL. Good thing you show pictures of the finished product. Hope you get out of your funk soon :) Have a great weekend :)
ReplyDeleteYup, I do everything with talons painted some version of deep red - sparkly deep red. I actually had them shortened a bit because I was going to be doing my plantings. They grow back quick.... and yes they are real.
ReplyDeleteI hope you find your knitting mojo soon. I've lost mine too. I wrap the plant/leaves with seal and press, and then stick them through the hole from the inside. I am not gentile enough to plant from the root side, even without gorgeous finger nails.
ReplyDelete